1. Log in to the Continuum platform.

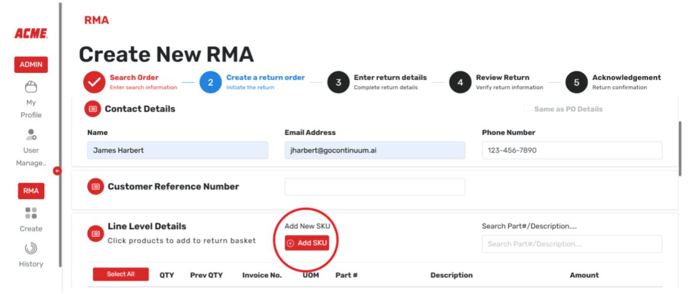
2. Click the Create button on the left side of the screen.
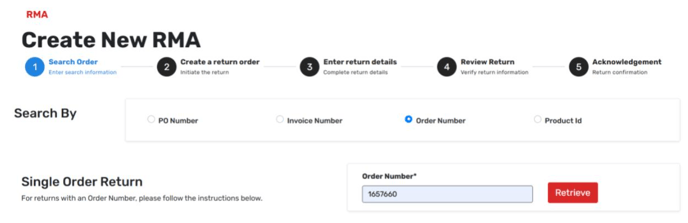
3. At the top of the screen, select PO Number, Invoice Number, or Sales Order.
4. Search for the specific PO number, invoice, or sales order you want to create an RMA for.
5. Select add SKU at the bottom
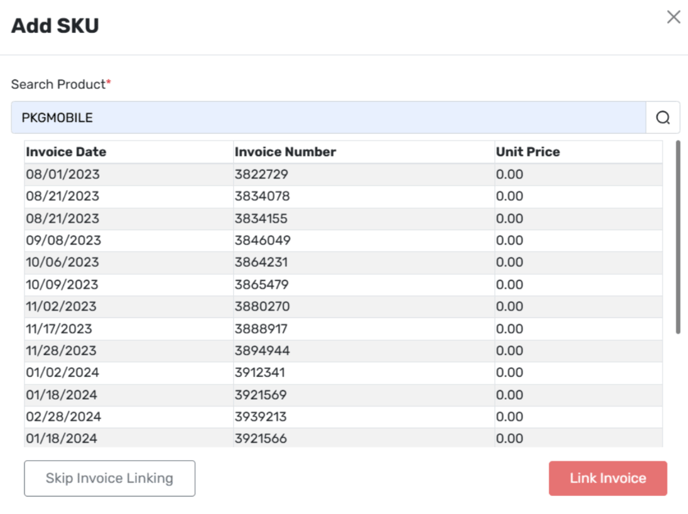
6. To link the SKU to an invoice select the invoice you want to link it to and select link.
7. If you do not want to link the invoice just select Skip Invoice Linking.
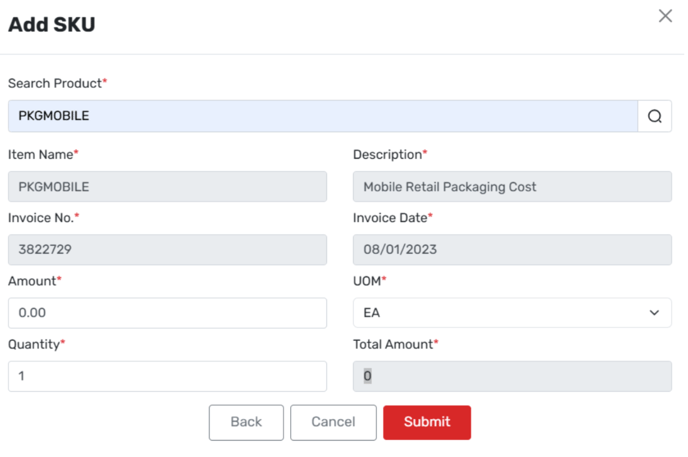
8. On the page that you are transitioned to, fill out the fields that are required and select submit.
9. Enter your contact information to receive notifications about updates.
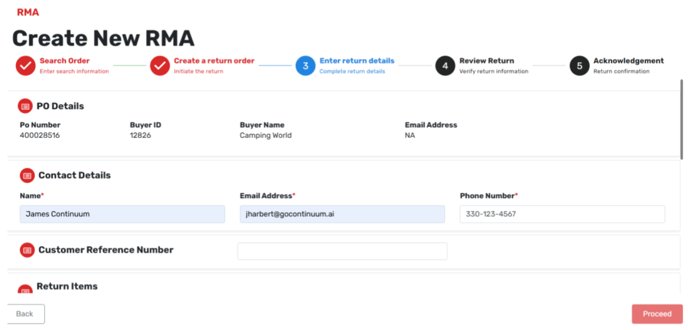
10. Select the reason code for the return.
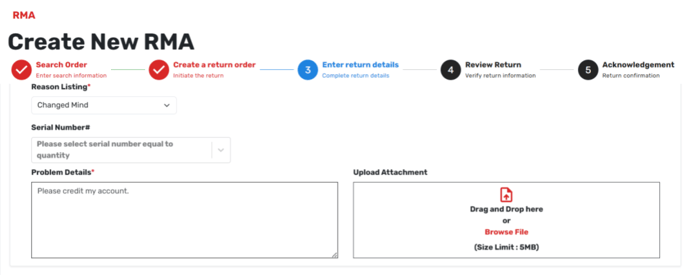
11. Fill out any mandatory fields that appear.
12. If necessary, add details and attachments, then click Proceed.
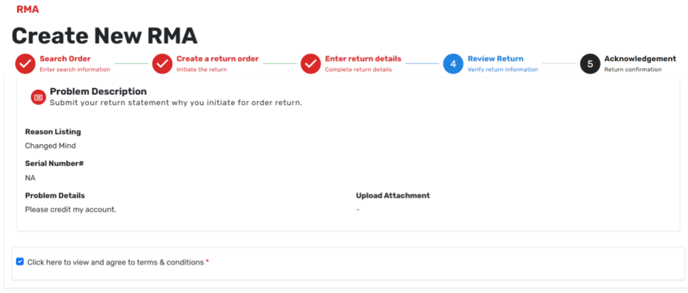
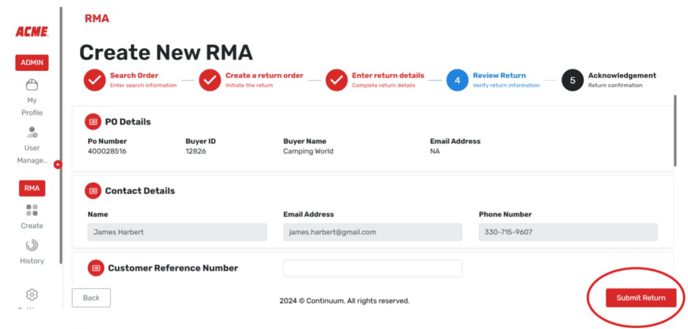
13. On the next page, verify that all information is correct and accept the terms and conditions if required.
14. Click Submit Return.
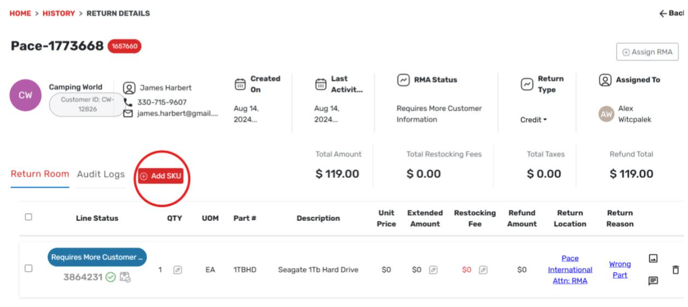
Please note, additionally you can add a SKU after the RMA is created.
This can be done by editing the order and you can add the SKU on this screen as seen below.